

A screenshot is a useful capture, but it is a poor calendar. It cannot alert you, adjust when you travel, or make a venue easy to find. Moving the information into Apple Calendar solves those problems, provided you review the event before saving it.
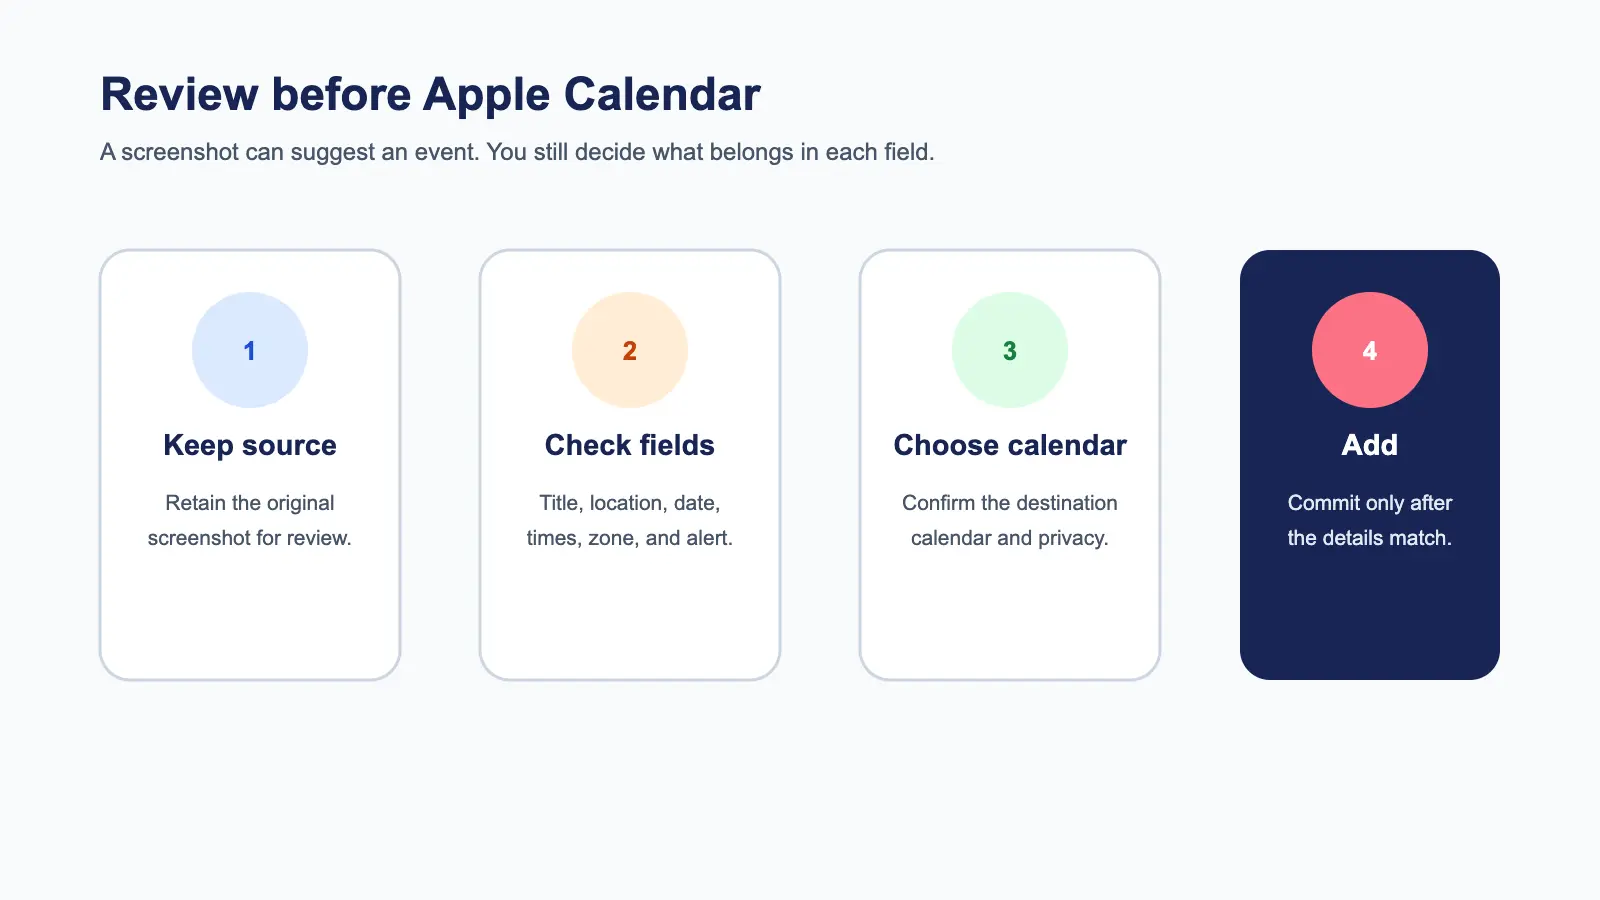
The safest workflow is simple: keep the screenshot as the source, use the screenshot-to-calendar tool to surface likely fields, check the uncertain ones, then save the reviewed event to the right calendar. This avoids the two common extremes of typing everything from scratch or trusting an automatic result you have not read.
Read the screenshot once before creating the event
Do not begin with the Apple Calendar form. First, scan the complete screenshot for the event name, date, start and end time, time zone, location, links, and instructions. Look for small text near the footer. Organizers often place venue details, check-in rules, or a video link there.
Also ask whether the screenshot contains one event. A school notice may include a trip and a form deadline. A webinar card may include a registration deadline and a live session. If the actions happen at different times, they should usually become separate calendar entries.
If the screenshot is cropped or blurry, return to the original message or page. A cleaner source is more valuable than a clever guess.
Map the evidence to Apple Calendar fields
Apple lets you create and edit events with a title, location, start and end times, repeat rules, alerts, invitees, attachments, notes, and other details (Apple iPhone Calendar guide). You rarely need every field.
Start with the fields that determine whether you will arrive at the right place and time:
- Title: Use the organizer's event name or a concise description of the activity.
- Date: Include the year, especially for saved tickets or old screenshots.
- Start: Preserve AM or PM and distinguish the official start from an arrival instruction.
- End: Use an explicit end time or a clearly supported duration. Do not invent certainty.
- Time zone: Confirm it for travel and remote events.
- Location: Keep the venue name, address, room, or online join link.
- Notes: Add preparation steps, confirmation details, and the source link.
- Alert: Choose a reminder that accounts for preparation and travel.
The field-by-field image guide explains how to handle every field in more depth.
For a wider view of the process, read the complete screenshot-to-calendar guide and the focused guide to extracting date and time from a screenshot.
Treat arrival time separately from start time
Suppose an appointment card says "2:00 PM" and "Please arrive 15 minutes early." The event starts at 2:00 PM. The arrival instruction is 1:45 PM.
You can preserve both by keeping the official start time and setting an earlier alert or adding the arrival instruction to the title or notes. Changing the event start to 1:45 PM hides what the organizer actually scheduled. Keeping only 2:00 PM makes the early arrival easy to miss.
The same logic applies to boarding, registration, check-in, and doors-open times. The calendar should tell you both what the organizer promised and what you need to do.
Check the time zone before you save
For a local haircut or neighborhood class, the device time zone is usually enough. For a remote interview, webinar, flight, or event captured while traveling, it may not be.
Apple Calendar can display events in a chosen time zone, and iPhone includes a Time Zone Override setting for Calendar (Apple time zone guide). That setting changes how events are displayed. It does not repair a source whose time zone was never established.
Use a named region when possible, such as America/New_York or Europe/London. Abbreviations like CST can refer to more than one region. Then compare the original time with the time shown in Calendar. Our calendar timezone checklist covers daylight-saving changes, recurring events, and travel cases.
Choose the destination calendar deliberately
Many people have several calendars on one iPhone: personal iCloud, work, family, school, and subscribed calendars. Before saving, check the Calendar field.
The destination controls visibility, sharing, and where later edits live. A personal medical appointment does not belong on a shared family calendar by accident. A work call saved only to a private local calendar may not appear where colleagues expect it.
This is also a good time to review invitees. A screenshot containing email addresses is not a request to send new invitations. If you are only making a personal reference copy, notes may be more appropriate than an attendee list.
Keep links usable
If the screenshot contains a video call, registration page, map, or agenda, find the original clickable link when possible. Links copied from an image can be truncated or visually ambiguous.
Place the join link where you can reach it at event time. Keep registration, preparation, and reference links in notes with short labels. If the source shows both a physical address and an online option, preserve both until you know which applies.
Set alerts around the action, not the screenshot
The right alert depends on what the event requires. An online call may need ten minutes. A school event may need a reminder the evening before. A train may need time for travel to the station. An appointment may require paperwork several days earlier.
Use more than one event when the preparation has its own deadline. For example, a conference on Friday and a registration deadline on Tuesday are not one calendar item with an unusually early alert. They are two commitments.
Use Recap as the review layer
With Recap, the screenshot remains the source. Recap turns source material into a structured, readable Recap Document. When strong time signals are present, a Calendar Sheet can surface proposed event details. You can confirm, edit, or cancel before sending them to a calendar.
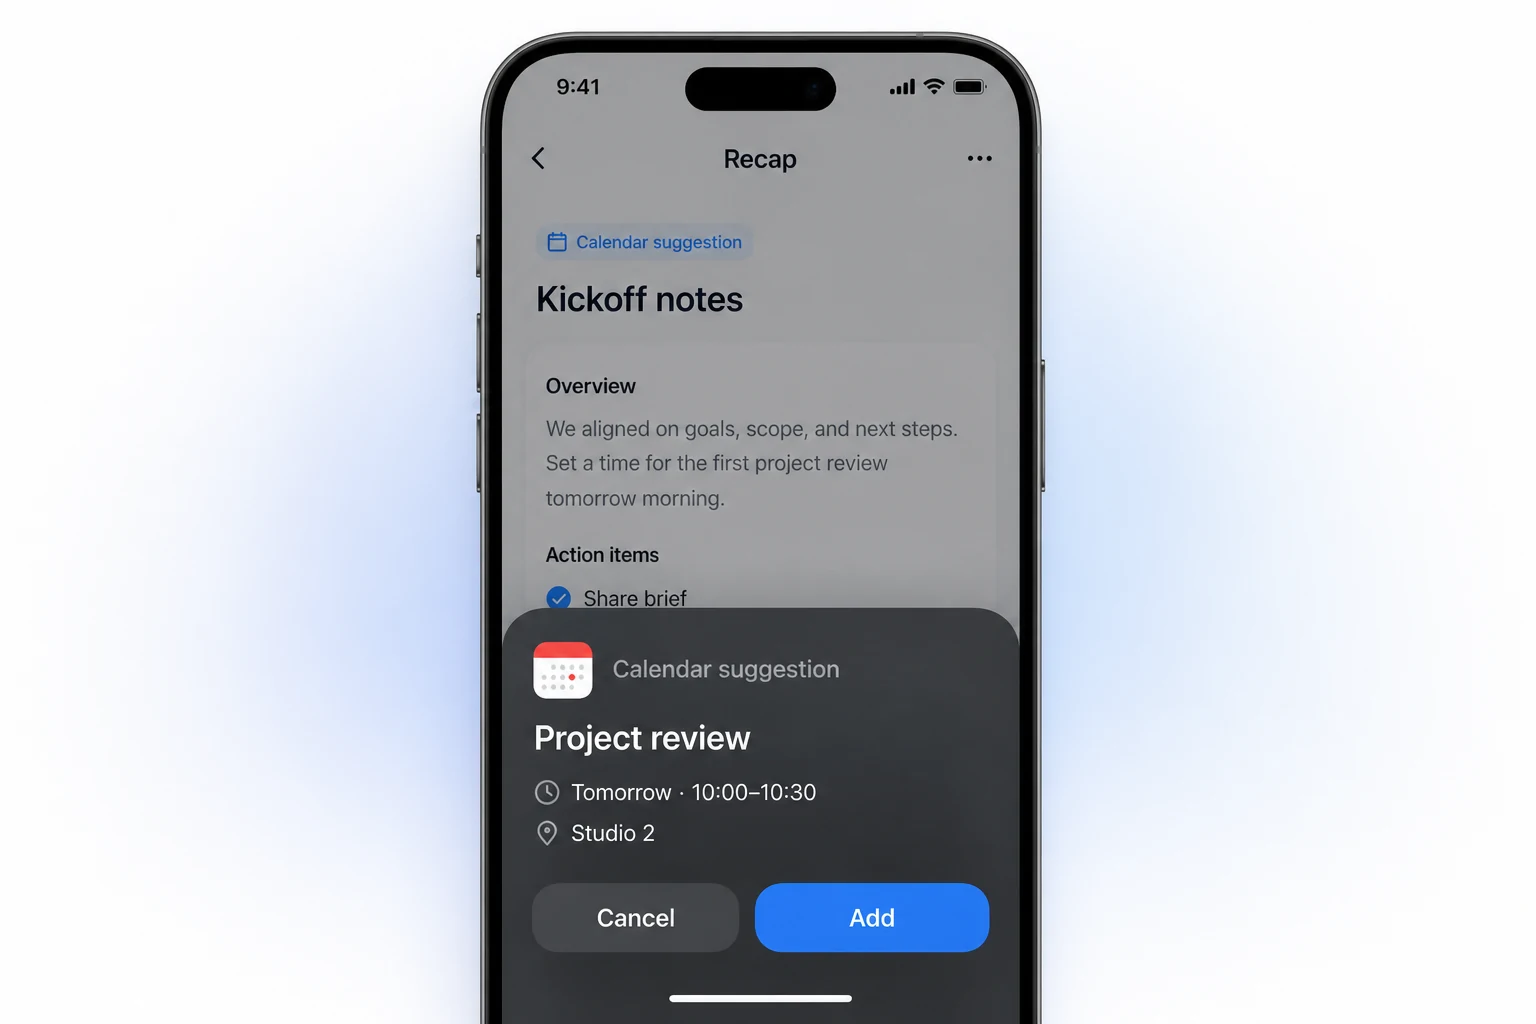
That sequence is useful because it keeps the evidence and the action together. You can compare the proposed date, time, location, and notes with the screenshot before anything leaves the review step. Recap does not need to make every decision for you. It helps make the decisions visible.
If the screenshot is a meeting invite, use the more specific meeting invitation review checklist. For a source containing several school actions, see how to split a school notice into calendar events.
A two-minute final check
Before saving to Apple Calendar, ask:
- Does the title identify the activity rather than the sender or app?
- Do the weekday, numeric date, and year agree?
- Are arrival, start, and end times distinct?
- Is the time zone correct for the source date and place?
- Is this the right destination calendar?
- Can you open the location or join link?
- Are alerts early enough for travel and preparation?
- Does the screenshot actually contain more than one event?
- Did you avoid exposing private details or inviting people unintentionally?
Save only after the event passes that check. The small review is what turns a screenshot into a calendar entry you can trust.
Continue in Recap
Turn this source into a Recap Document
Make it easier to read, then send time-based details to Calendar, export it to Workspace, or start PBL Learning.